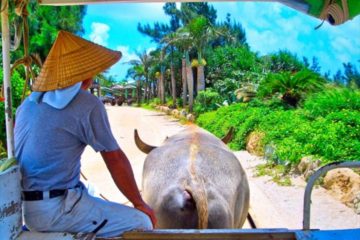
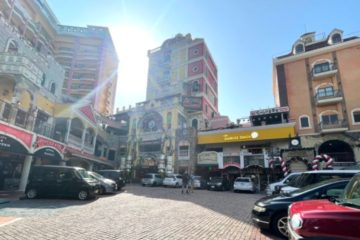
In recent years, it's become easy to take beautiful photos not only with SLR and mirrorless cameras, but also with smartphones. For example, Apple's higher-end models (iPhone 11 and above) boast exceptional camera performance, with high image quality, excellent image stabilization, and autofocus. As a heavy user of smartphone cameras myself, I'm even impressed by how far smartphone cameras have come!
Smartphone cameras are evolving at a dizzying pace. They've become a recommended tool for taking travel photos. Because of their high performance, anyone can take amazing photos with just a little ingenuity. This time, we'll introduce some tips for taking and editing photos using an iPhone as an example.
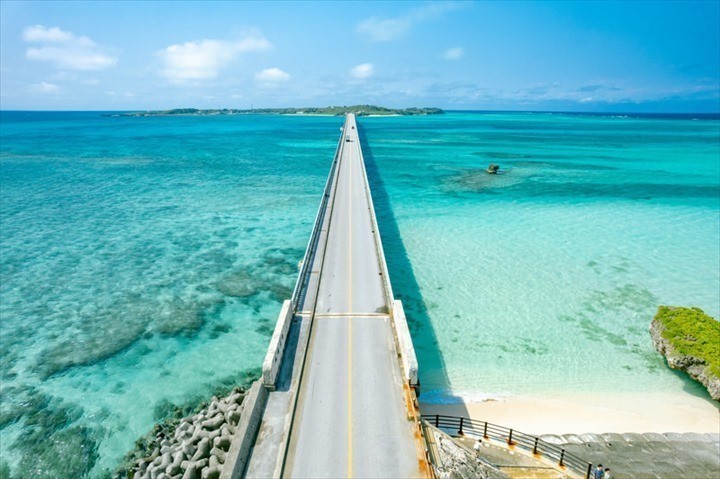
1. Wide-angle photography – Be mindful of the irregularity and try to capture the sea while including clouds!

One of the most distinctive features of smartphone cameras is their wide-angle capability. In particular, many recent smartphones feature ultra-wide-angle lenses that are simply not possible with DSLR or mirrorless cameras.
In Okinawa, where the crystal-clear, beautiful sea stretches out majestically, you'll definitely want to master the use of a wide-angle lens. By keeping two points in mind while shooting, you can capture expressive landscapes that are anything but monotonous.
First, be mindful of irregularity. If the lines in the image (horizon, coastline) are parallel, it can become somewhat monotonous. By deliberately breaking the parallel lines, you can create a more original photograph.
Another tip is to include clouds. This adds an accent and results in a magnificent, painterly photograph. Okinawan landscapes are especially beautiful when the contrast between white and blue is emphasized.
2. HDR Shooting – Capture sharp images even in scenes with high contrast!

Modern smartphone cameras boast truly advanced shooting capabilities. One notable feature is HDR (High Dynamic Range) photography. HDR photography is a technique that simultaneously captures three photos with different brightness levels and automatically selects the best parts of each to create a composite image.
This feature has been included in smartphones for a long time, but in the past, you had to change the settings. However, nowadays, many models automatically activate it according to the scene, and the image quality has improved dramatically.
It's especially effective when there are large differences in light and shadow, or when shooting against the light. Because it allows you to take photos with just the right amount of accent, especially in scenes that might seem difficult to photograph, you should definitely give it a try!
I often use this feature, especially on cloudy days or during the darker hours around sunrise and sunset. However, if the contrast is too great, it can exceed the limits of the correction, so some practice is necessary.
3. Capture the Moment – Don't Miss a Single Moment! Capture the breathtaking waves!

"Less prone to camera shake." This is a particularly valuable feature when traveling. It's disappointing when you encounter a wonderful landscape on your trip, only to have the photo ruined by camera shake. Smartphone cameras, with their bright lenses and powerful stabilization features, minimize the possibility of blur.
On the other hand, even in situations where a DSLR or mirrorless camera would likely result in significant camera shake, smartphone cameras can still capture images with high resolution, which is another attractive feature.
For example, the waterline.
It's possible to capture the waves in vivid detail as they splash and change their appearance one after another! By using continuous shooting mode, you can even express the beauty of a fleeting moment.
Many modern smartphone cameras maintain image quality even with 2x zoom, so if you have one of those models, I recommend trying to capture the shape of the waves using the zoom function.
4. Food Photography 1: Excellent White Balance Adjustment Comes in Handy!

To capture everything from outdoor scenery to indoor gourmet food, even with a DSLR or mirrorless camera, you need practice and detailed settings. However, with a smartphone camera, not only is that unnecessary, but you can sometimes take even better photos than with these professional cameras!
Indoors, you need to adjust the white balance (the optimal color temperature for capturing white as white) depending on the color tone of the lighting used, but recent smartphone cameras automatically adjust it naturally.
"I can't believe how easy it is to take pictures!" Shooting is so effortless! Some camera users even use their iPhones as a secondary camera. I'm one of them.
The key to taking great photos is simply to get close to the food and focus on the part you want to be the clearest. If you fill the frame with the food and avoid including anything in the background, you'll be able to take delicious-looking photos.
5. Food Photography 2 - Excellent Portrait Function! Background Blur on Your Smartphone -

What's truly amazing about recent smartphone cameras is that they've become capable of taking photos that are almost as good as those taken with high-performance cameras.
Traditionally, the biggest difference between smartphone cameras and SLR/mirrorless cameras has been the amount of bokeh they can produce. Since smartphone cameras are generally not used for zooming, it was impossible to focus on a subject in the foreground and blur the background.
However, nowadays, portrait mode, which allows for this, is becoming standard equipment, greatly expanding the range of photography possibilities. When this mode is selected, if you shoot from a certain distance from the subject, you can beautifully blur the background!
When shooting in this mode, it's a good idea to consider the composition while making good use of the background.
6. Tips for editing smartphone photos using Adobe Lightroom

So far, I've introduced five ways to take photos and some of the features of smartphone cameras, but the next important thing is the editing techniques after shooting. By applying appropriate corrections according to the scene and desired expression, you can further improve the quality of your photos.
At first glance, image correction might sound difficult, but by paying attention to just a few key points, you can dramatically change the impression of your photos. This time, we'll introduce it using "Adobe Lightroom," which can be downloaded for free on smartphones and has excellent functionality, as an example.


① If you want a sharp, high-resolution image → Increase clarity and texture.

First, the most frequently used settings are texture and clarity, which are used to make photos sharper. These can be adjusted from the Effects tab. No matter how high-resolution smartphone cameras have become, they still can't match the pixel count of DSLR or mirrorless cameras.
By adjusting these two settings, you can achieve higher resolution and create a more professional-looking photograph. It's also effective for minor corrections when the focus is slightly soft.
② If you want more saturation → Select Mixer from Color. Adjust the colors individually.

Of all the scenery in Okinawa, what's most captivating is undoubtedly the beautiful ocean views. You can enhance the vibrancy of a photo by changing the saturation, but at the same time, the saturation of all colors will increase, sometimes resulting in an unnatural-looking photo.
In such cases, selecting the color mixer allows you to adjust the saturation of each color. Since it also includes hue and brightness options, you can achieve your desired look as closely as possible.
③ If you want to completely change the flavor → Use a profile

On the other hand, you can also completely change the look using a profile. A profile is a package of various corrections, and your photos will be automatically corrected based on the theme you choose.
For those unfamiliar with photo editing, this profile makes it easy to customize your photos to your liking. You can also fine-tune your selections within the chosen theme by changing the central gauge.
④ If you want a unique look → Try using vignetting correction in reverse.
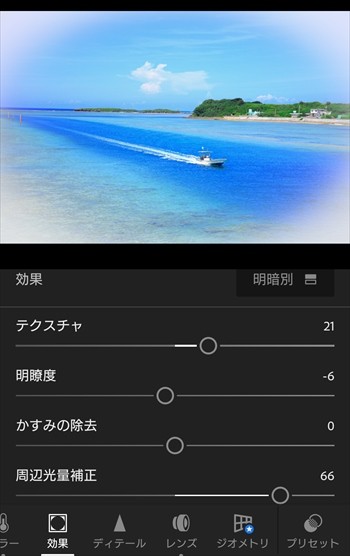
Finally, a slightly more advanced technique: using the "Peripheral Illumination Correction" option in the Effects tab is also effective.
Originally, this function was designed to correct unevenness in the corners of a photograph, which can occur due to the lens used with a single-lens reflex camera. However, by deliberately using this function in reverse, you can also add a unique touch to your photographs.
The thinned corners create a window-frame-like effect, drawing the viewer in. This is especially effective for photos that might otherwise seem monotonous!
Anyone can enjoy taking photos! Your smartphone camera is the perfect travel companion.

Five years ago, smartphones were somewhat inadequate for use as cameras. However, they have now evolved to a quality that makes them recommendable as photographic equipment. The enjoyment of photography, which previously required an investment of hundreds of thousands of yen, can now be enjoyed more casually and easily.
Smartphone cameras are the perfect travel companions. Why not try using yours while keeping the points we've introduced in mind?

Yuhei Tonosho, a cyclist and photographer who delves deep into Japan
Born in 1993 in Toyota City, Aichi Prefecture. Graduated from Doshisha University, Faculty of Letters, Department of Cultural History and Department of English Literature. While working as a salaryman, he is a travel writer who travels all over Japan by bicycle and mountain climbing. He captures and shares the changing seasons of Japan with all his senses.


Shirokuma Tours offers affordable Okinawa package tours. A wide variety of options are available, including tours to Ishigaki and Miyako Islands.


For local experiences and optional tours such as snorkeling and sightseeing bus tours, choose Tabi Plus One.


For diving in Okinawa, from license acquisition and fun dives to introductory experiences, choose Oceans Dive Tour.
Articles from the same area
 55 Popular Hotels, Islands, and Tourist Spots on Okinawa Tours
 A scenic drive around the main island! A trip to enjoy delicious Okinawan local snacks.
 You can swim in the ocean in Okinawa even in October! October is the best time to visit Okinawa.
 Ranking of activities you want to try in Okinawa! 1000 men and women choose these "experiences they want to try in the tropics."
 Meet sea turtles in Okinawa! Swim with them! Information on nesting season and sea turtle spots.
 18 of Okinawa's Best Luxury Hotels and Accommodations (2025 Edition) | Okinawa Lab
Articles on the same topic
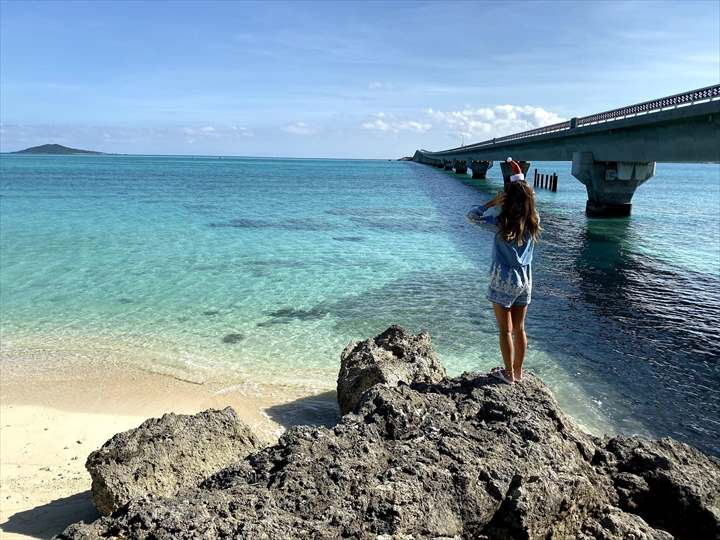 Enjoy Miyako Island in its unique winter season! Here are some recommended sightseeing plans!
 [Short-term move to Okinawa] Quitting my job and starting a long-term stay with just a backpack | Naha/Asato edition
 From the rainy season to summer! A guide to enjoying your June trip to Okinawa [Sightseeing spots & events]
 A 2-night, 3-day itinerary for first-time visitors to Miyako Island | A classic plan exploring breathtaking scenery and Instagrammable spots.
 Discount information for Okinawa Churaumi Aquarium | Check in advance if you plan to purchase tickets on the day!
 Want to visit Okinawa? Here's how to enjoy 11 roadside rest areas in Okinawa!